
Introduction
When first learning how to integrate my Bootstrap and Django, I wasn’t able to find a quick cheat sheet to reference without visiting different documentation pages. To help others I’ve put together a list below of the tags I used most often. A full list of Django tags and filters can be found here.
Django Cheat Sheet: Bootstrap To Django
Extending Files
Headers, Navbar, and Footer
The neat part about Django is that everything is modular, meaning the code is created in repeatable chucks. This allows the developer to easily implement the components of code that stay the same across the site including the header, navigation bar, and footer.
Below is the code I used for my header, footer, and navbar. If you read the comments in the code, they’ll explain the different parts as well as what to change for your own project. Please read below the code for more details.
<!-- This loads of all of files that you call below from your 'static' folder -->
{% load staticfiles %}
<!--The static folder consists of your bootstrap files (.css, .js, fonts, etc)-->
<!--When you load the static folders is calls all those folders in the static files without having to code each one in individually-->

<html>
  <head>
    <!--This is the meta information which is good for SEO-->
    {% block head-meta %}
  	<meta charset="utf-8">
  	<!--Add keywords that describe your project between the quotation marks. This helps search engines find and index your content-->
    <meta name="keywords" content="REPLACE WITH YOUR OWN KEYWORDS HERE, AND HERE, AND HERE">
    <meta http-equiv="X-UA-Compatible" content="IE=edge">
    <meta name="viewport" content="width=device-width, initial-scale=1">
    {% endblock %}

<!--The Block CSS is an example of what could go in your base.html file. If you already have these added into your static files then
there's no need to call them here because you already loaded the static files at the top of the document. If these files are already in
your static files then delete the 'block head-css below'-->

    {% block head-css %}
    <link href="{% static 'bootstrap/css/bootstrap-theme.css' %}"
          rel="stylesheet" media="screen">
    <link href="{% static 'bootstrap/css/bootstrap.css' %}"
          rel="stylesheet" media="screen">
    <link href="{% static 'bootstrap/css/bootstrap.min.css' %}"
          rel="stylesheet" media="screen">
    <link href="http://maxcdn.bootstrapcdn.com/font-awesome/4.2.0/css/font-awesome.min.css" rel="stylesheet">
    <link href="{% static 'bootstrap/css/custom.css' %}"
          rel="stylesheet" media="screen">
    {% endblock %}

  </head>


<!-- This is the start of the navigation bar at the top of the page-->
<header>
    <div class="container clearfix">

<div class= "navbar-wrapper">
    <div class="container">
        <nav class = "navbar navbar-inverse navbar-fixed-top" id="navbar_whole">

                <div class = "navbar-header">
                    <button type= "button" class = "navbar-toggle collapsed" data-toggle = "collapse" data-target= "#navbar" aria-expanded="false" aria-controls = "navbar">
                        <span class="sr-only">Toggle navigation</span>
                        <span class="icon-bar"></span>
                        <span class="icon-bar"></span>
                        <span class="icon-bar"></span>
                    </button>
                    <!--Below is the top-left hand side of the screen where you usually see a company/project name and a logo-->
                    <!--The next line sends the user back to the home page-->
                    <a class="navbar-brand" href="{%url 'index' %}">
                        <!--Insert the file name of your brand image below after the 'img'-->
                         <img class="img-responsive" src="/static/bootstrap/img/INSERT IMAGE OF BRAND HERE">
                    </a>
                </div>

                <div id= "navbar" class="navbar-collapse collapse">
                    <ul class="nav navbar-nav">
                      <!--Below is where you put the rest of the links to the pages you've created. Please reference your own models
                       in Django.-->
                        <li>
                            <a href="{% url 'index' %}">Cities</a>
                        </li>
                        <li>
                            <a href="{% url 'all_cafes' %}">Cafes</a>
                        </li>
                    </ul>
                </div>
        </nav>
    </div>
</div>
</div>
</header>

<!-- This is where you'll put your page content. Leave it blank for now. -->
<div class="container">
{% block content %}Nothing Here{% endblock %}
</div>


<!-- This is where the footer begins -->
<footer>
<div class= "navbar navbar-inverse navbar-static-bottom" role="navigation">
    <div class="navbar-text pull-left">
    </div>
    <div class= "navbar-text pull-right">
<!-- Add in your social media / github links here -->
        <a href="https://github.com/clarkdatalabs">
            <i class="fa fa-github-square fa-2x"></i></a>
    </div>
    <!--Below is the copyright information for the site. You can fill in your own here.-->
    <div class="navbar-text pull-left">
    © Digital Projects Studio, 2015
    </div>
</div>
</footer>
<!--This is my javascript block. If you've included the javascript files you need in the 'static' folder then there's no need to
put this here and you can delete the block below.-->
{% block head-javascript %}
    <script src="{% static 'bootstrap/js/bootstrap.min.js' %}"></script>
    <script src="{% static 'bootstrap/js/bootstrap.js' %}"></script>
    <script src="https://ajax.googleapis.com/ajax/libs/jquery/1.11.3/jquery.min.js"></script>
  <script src="http://maxcdn.bootstrapcdn.com/bootstrap/3.3.5/js/bootstrap.min.js"></script>
{% endblock %}

</html>
Looking at the code above, everything with the “{% %}” is specific to Django. For each of these “{% %}” chunks you could choose to call the specific block of code and extend it. Extending means calling the block of code using a single line of code instead of rewriting everything. I’ve found it is easiest to extend the entire set up (i.e. header, navbar, and footer) using this snippet of code at the beginning of each new html file:
{% extends "NAME OF YOUR PROJECT/repeatable_content.html" %}
The file above could also be called your ‘base.html’. I’ve only called it repeatable_content.html to make a point that you should put anything that repeats on every page into this file. If you are reading stack overflow and they refer to the base.html, this is the file they’re often referring to.
Also be sure to include the {% load staticfiles %} at the beginning of each page so that your css, javascript, and images load properly. Also leave the body content empty in the above code (unless it’s repeatable) because this should change for every new page.
Titles
Putting a title at the top of the page in Django is slightly different than normal bootstrap. To get the title to appear I used the following code:
<!--Extend your file up here-->

{% block head-title %}
    Your title
{% endblock %}

<!--insert your body content code down here-->
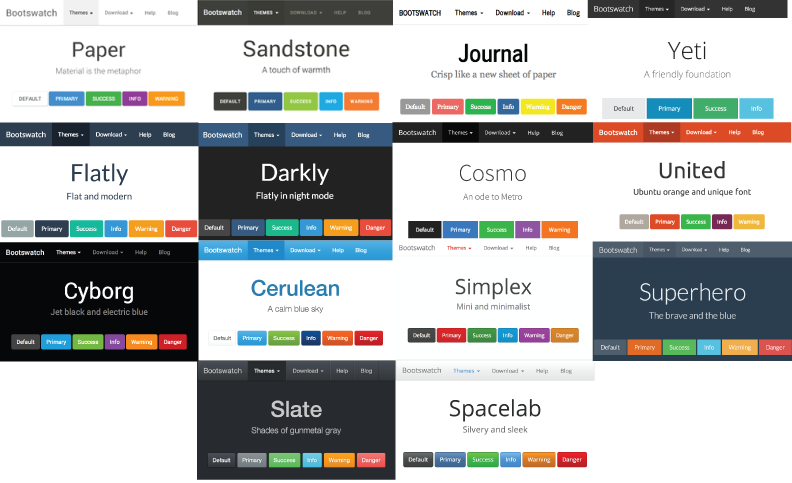
BootStrap vs Template UI Kit
As a refresher, the layout in bootstrap is created using a grid system comprised of containers, rows, and columns. There are two ways to do the bootstrap interface in Django. One way is to code bootstrap as you have traditionally with only a few changes we’ll discuss below. The second way is to download the Django Bootstrap UI Kit and choose template theme to start out with. You can overwrite anything in the template file that you don’t like but it provides a good starting point for a project.
In the example above, I was writing code in the way you’d traditionally write bootstrap code. If you’d like to use the Django Bootstrap UI Kit you’ll need to follow the instructions provided here.
Here are some of the template examples that are provided by the UI Kit:
Filling In the Content
Adding Images
Adding images to the content has a slightly different syntax in Django than in HTML.
<div align="center">
  <img class="cafe_thumbnail" src="/media/{{cafe.file_up}}"/>
</div>
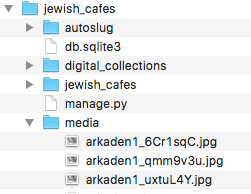
In Django all of the images that are uploaded through the admin panel go into the ‘Media’ file, which is placed at the same level as your manage.py in the file directory. When you upload a new image into Django, Django will automatically rename the file to give it a unique address. That’s why you’ll see the ‘_’ and numbers/letters appended after the original name of the file (see media file below).
The {{cafe.file_up}} is coming from my model and the admin panel. In the model view below, you’ll be able to see where the name of my class, ‘cafe’ has an attribute ‘file_up’
class Cafe(models.Model):
    cafe = models.TextField()

<!--Below is where the image upload is located in the model-->
    file_up = models.FileField(blank=True)

    url = AutoSlugField(populate_from='cafe', editable=True,unique=True, blank=True)
    cityName = models.ForeignKey(City)
    established = models.CharField(max_length=10, blank=True)
    latitude = models.DecimalField(max_digits= 7, decimal_places=4)
    longitude = models.DecimalField(max_digits= 7, decimal_places=4)
    closed = models.CharField(max_length=10, blank=True)
    description = models.TextField(blank=True)
    needsReview = models.BooleanField(default=False)

    def __unicode__(self):
        return self.cafe
In the view below it shows where the researcher uploads the image in the Admin Panel.
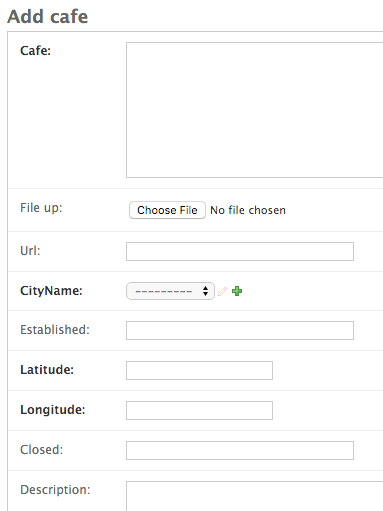
This shows up because in the admin.py file I defined that view:
from django.contrib import admin
from django.contrib.auth.models import User
from django.contrib.auth.admin import UserAdmin
from django.contrib.admin import AdminSite

from .models import Map, City, Cafe, Person, Item, CafeExhibit

admin.site.register(Map)
admin.site.register(City)
admin.site.register(Cafe, CafeAdmin)
admin.site.register(Person)
admin.site.register(Item, ItemAdmin)
admin.site.register(CafeExhibit)
See that ‘Cafe’ is listed as one of the import options into the Admin panel.
Adding Links
Adding links in Django has a different syntax than typical HTML. Looking at the code below you’ll see the typical HTML anchor tag <a> but inside of the ‘href’ you’ll see the curly braces and percent signs “{% %}” typical to Django.
<div class="item">
   <ul>
    	<li class = "big_title"><b>More Information: <a href = "{% url 'cafe' cafe.url %}">{{cafe.cafe}}</a></li>
   </ul>
</div>
To go to another page using Django the url is doing a couple of things. First, the ‘cafe.url’ is telling Django the view to be displayed and it’s HTML file name, so the file can be located to display. Here is my cafe.url snippet:
url(r'^cafe/(?P<location>[a-z0-9\-]+)/$', views.cafe, name='cafe'),
Since my cafes are location specific, I’ve added in some regular expressions so that each view is location specific.
Second, the url is calling the view that I’ve defined as ‘cafe’ so that when you click Django knows the type of content that should be shown on the page as defined by what you call in your HTML file.
def cafe(request, location):
	city = City.objects.get(cafe__url=location)
	exhibits = CafeExhibit.objects.filter(cafeName__url=location)
	cafe = Cafe.objects.get(url=location)
	Context = {'exhibits':exhibits,'cafe':cafe, 'city':city}
	return render(request,'jewish_cafes/cafe.html', Context)
In the case above, my next page will be able to show location specific information about the cafes being highlighted in the project including a number of exhibits about different cafes in the same city.
Getting Content to Populate
if and for statements
Since Django is Python based, you can use ‘if’ and ‘for’ statements to populate content on the page.
<!--Use the 'if' statement to call the class in the model you'd like to display-->
{% if cafes %}
<!--Use the 'for' statement to iterate through the model-->
    	{% for cafe in cafes %}
<div class = "col-xs-12">
<!--This line of code creates multiple rows.-->
<div class="{% cycle 'row1' 'row2' %}">
<div class="item">
         <div align="center">
            <img class="cafe_thumbnail" src="/media/{{cafe.file_up}}"/>
        </div>
            <ul>
    	<li class = "big_title"><b>Name:</b> {{cafe.cafe}}</li>
        <br />
    	<li class = "big_title"><b>City: </b>{{cafe.cityName}}</li>
        <br />
    	<li class = "big_title"><b>More Information: <a href = "{% url 'cafe' cafe.url %}">{{cafe.cafe}}</a></li>
	</ul>
</div>
</div>
</div>
{% endfor %}
</div>
</div>
{% else %}
    <p></p>
{% endif %}
In this code the first thing that is called is an ‘if’ statement. This is to call the ‘cafes’ class from the model.py (see above). Next I call a ‘for’ statement to make the code iterate through the model multiple times. This is a huge time saver because otherwise I’d have to code every single cafe by hand and add in a new cafe each time. This way, the cafes automatically populate. To get the information to populate in each row, you need to add in a specific line of code that iterates through the rows of data:
<div class="{% cycle 'row1' 'row2' %}">
#Put the code you want to iterate through here
</div>
This line of code is also provided in the example above. Between the code where is says “#Put the code here you want to iterate through”, this is where you put elements of your class in the Django model you’d like to populate from (in my case ‘cafe’).
Adding in a Gallery
One of the elements I really like about Bootstrap is the gallery where you can flip through pictures. It’s a great way to highlight the images that are important to your projects. Here’s an example of a gallery:
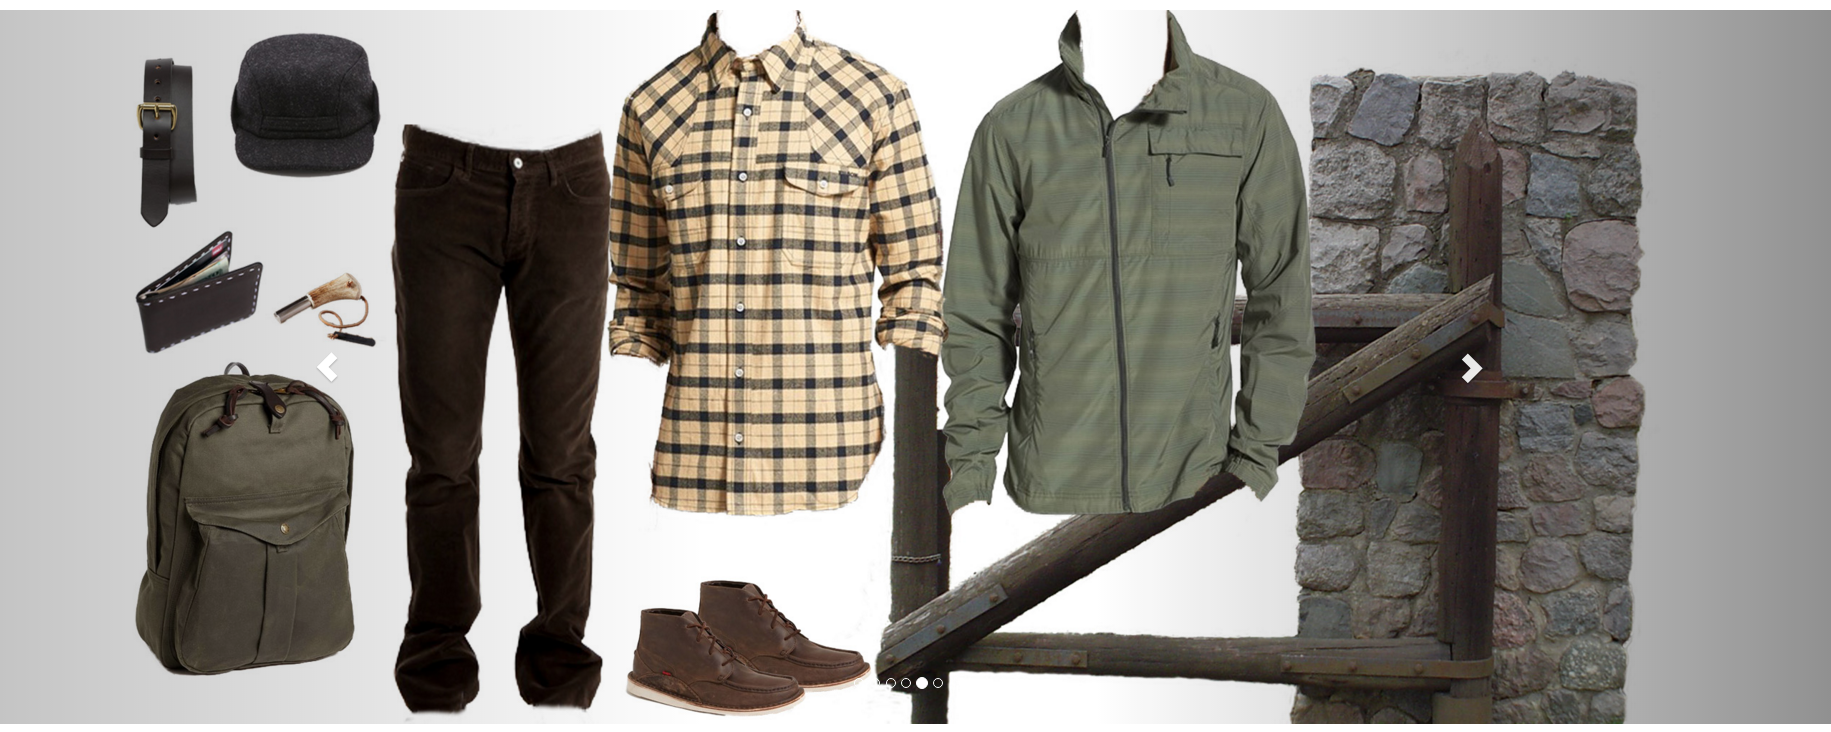
Above is a gallery example that I used for another site to show off clothing collages of products. You’ll notice you can click the left and right arrows to go through the gallery. To implement this gallery you’ll need to create a Model for the project similar to what’s been described above. Below is the code to implement the bootstrap gallery in Django:
{% block content %}
<!--The line below calls the class where my gallery images are located-->
{% if exhibit %}
<div class= "container_special">
  <!--The forloop counter tells the gallery code which slide to start with. If you want the first one then start with '0' like below-->
<div id="carousel-generic" class="carousel slide" data-ride="carousel" data-interval="0" data-slide-to="{{forloop.counter0}}">
<!-- Wrapper for slides -->
<div class="carousel-inner" role="listbox">
<!--These lines tell the items in exhibit to be active until they run out of content i.e. images-->
{% for item in items %}
<div class="item {% if forloop.first %} active {%     endif %}">
  <div align="center">
    <!--The line below calls the item in the class where the files have been uploaded in the Admin Panel-->
    <img class="exhibit_img" src='/media/{{item.file_up}}'>
    <!--I like to add in captions for accessibility purposes. Also this slide is turned off so it doesn't automatically scroll.
    Having a gallery automatically scroll is bad usability because screen readers will constantly restart everytime a new slide comes up-->
    <p> <em>Photo Caption:</em> {{item.caption}}</p>
  </div>
</div>
{% endfor %}
</div>
 <!-- There are the Left and Right Controls to change the pictures -->
  <a class="left carousel-control" href="#carousel-generic" role="button" data-slide="prev">
    <span class="glyphicon glyphicon-chevron-left"></span>
  </a>
  <a class="right carousel-control" href="#carousel-generic" role="button" data-slide="next">
    <span class="glyphicon glyphicon-chevron-right"></span>
  </a>
</div>
</div>
{% endif %}
{% endblock %}
adding in a Leaflet map/jumbotron
Adding a leaflet map is also possible with Django. To get the map to fit the constraints of the screen width and height I utilized the jumbotron feature of Bootstrap (see below).
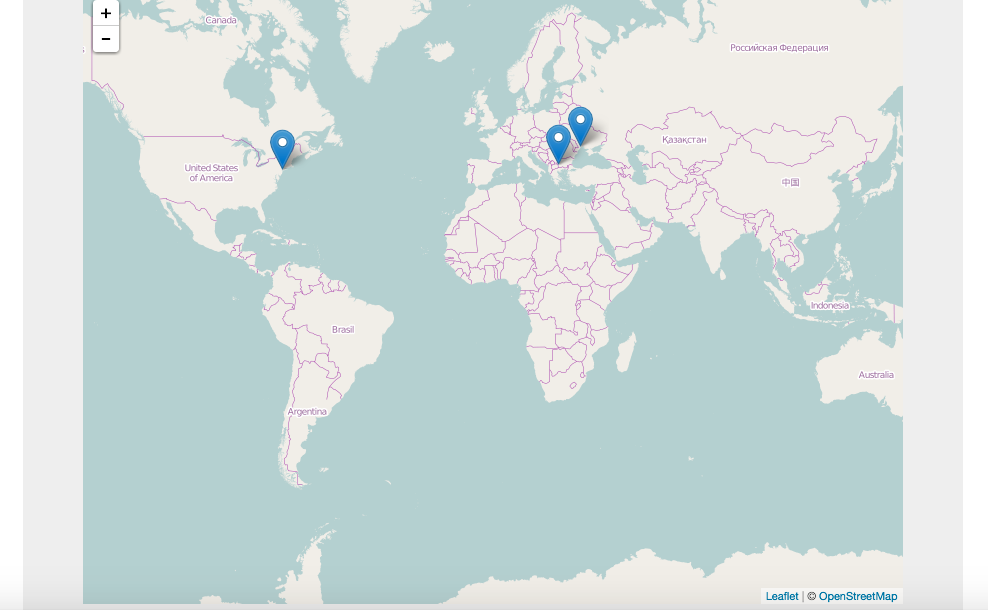
Here is the code to implement a map like what’s seen above, although you’ll have your own data points because on the model you set up.
{% load staticfiles %}
{% block content %}
<div class="spacer2"></div>
<div class="container_special">
<div class="jumbotron specialjum">
<script src="http://code.jquery.com/jquery-1.11.0.min.js"></script>
<link href="http://cdn.leafletjs.com/leaflet-0.7.3/leaflet.css" media="screen, print" rel="stylesheet">
<script src="http://cdn.leafletjs.com/leaflet-0.7.3/leaflet.js"></script>
<body>
<!--This is the open street map that's being used from Leaflet-->
var modern = L.tileLayer('http://{s}.tile.openstreetmap.org/{z}/{x}/{y}.png', {attribution: '© <a href="http://www.openstreetmap.org/copyright">OpenStreetMap</a>',
    noWrap: true,
});

<!--Create the map with the tilesets-->
var map = L.map('map', {
    layers: [modern]
});

<!--This fits the map to the world view. Otherwise you might see continents repeating multiple times-->
map.fitWorld().zoomIn();

<!--This is calling the points for the city and the data for each-->
var geo_json =
    '{"type":"FeatureCollection","features":[{% for city in cities %}{"type": "Feature","properties":{"name" : "{{city.cityName}}","url" : "{% url "city" city.url %}"},"geometry":{"type":"Point","coordinates":[{{city.longitude}},{{city.latitude}}]}}{% if not forloop.last %},{% endif %}{% endfor %}]}'


var geodata = JSON.parse(geo_json);


var geolayer = L.geoJson(geodata, {
    onEachFeature: showPopup
});

<!--Add the points to the map-->
geolayer.addTo(map);

<!--This allows you to click the point-->
function showPopup(feature, layer) {
    var key, val;
    var content = [];
    for (key in feature.properties) {
        val = feature.properties[key];

        if (key == "url") {
            val = '<a href="' + val + '" />View City</a>';
            key = "";
        }
        content.push("<strong>" + val + "</strong>");
    }
    layer.bindPopup(content.join("<br />"));
}
</script>
</div>
</div>
{% endblock %}
You’ll notice in the ‘var geo_JSON’ tag that Django tags are still being implemented from the Model i.e. {{city.latitude}}. There’s some customization that’ll need to be done to the code to get your own data points to load, and I’ve tried to note the purpose of each code line above to help make that process easier.
Thank You
Thanks for reading! I hope you found this post helpful. If there’s topics you’d be interested in learning more about comment below.